教你2分钟使用Docker搭建Nginx并访问静态资源 |
您所在的位置:网站首页 › nginx 配置 教你 › 教你2分钟使用Docker搭建Nginx并访问静态资源 |
教你2分钟使用Docker搭建Nginx并访问静态资源
|
文章目录
1. 拉取Nginx镜像2. 创建挂载目录3. 配置Nginx4. 启动Nginx4.容器中修改首页5.静态资源访问
1. 拉取Nginx镜像
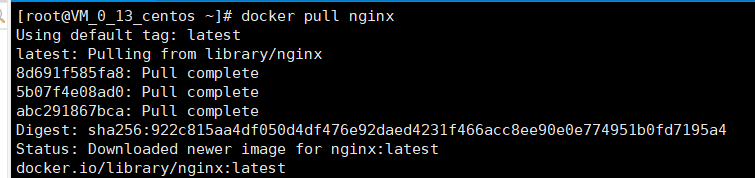
docker pull nginx mkdir -p /data/nginx/{conf,conf.d,html,logs} 说明 -p表示递归创建文件夹,这里挂载是为了后面配置Nginx方便,不创建挂载后面配置Nginx需要进入容器配置 3. 配置Nginx这里因为我们创建了挂载目录 所以我们可以直接对上面的目录进行配置从而直接同步到容器中的配置文件 这里我们直接通过xftp把配置文件上传 我们这里的nginx配置文件如下,这里可以直接进入容器然后看配置文件copy出来也可以 nginx.conf #user nobody; worker_processes 1; #error_log logs/error.log; #error_log logs/error.log notice; #error_log logs/error.log info; #pid logs/nginx.pid; events { worker_connections 1024; } http { include mime.types; default_type application/octet-stream; #log_format main '$remote_addr - $remote_user [$time_local] "$request" ' # '$status $body_bytes_sent "$http_referer" ' # '"$http_user_agent" "$http_x_forwarded_for"'; #access_log logs/access.log main; sendfile on; #tcp_nopush on; #keepalive_timeout 0; keepalive_timeout 65; #gzip on; server { listen 80; server_name localhost; #charset koi8-r; #access_log logs/host.access.log main; location / { root /usr/share/nginx/html; index index.html index.htm; } #error_page 404 /404.html; # redirect server error pages to the static page /50x.html # error_page 500 502 503 504 /50x.html; location = /50x.html { root html; } # proxy the PHP scripts to Apache listening on 127.0.0.1:80 # #location ~ \.php$ { # proxy_pass http://127.0.0.1; #} # pass the PHP scripts to FastCGI server listening on 127.0.0.1:9000 # #location ~ \.php$ { # root html; # fastcgi_pass 127.0.0.1:9000; # fastcgi_index index.php; # fastcgi_param SCRIPT_FILENAME /scripts$fastcgi_script_name; # include fastcgi_params; #} # deny access to .htaccess files, if Apache's document root # concurs with nginx's one # #location ~ /\.ht { # deny all; #} } # another virtual host using mix of IP-, name-, and port-based configuration # #server { # listen 8000; # listen somename:8080; # server_name somename alias another.alias; # location / { # root html; # index index.html index.htm; # } #} # HTTPS server # #server { # listen 443 ssl; # server_name localhost; # ssl_certificate cert.pem; # ssl_certificate_key cert.key; # ssl_session_cache shared:SSL:1m; # ssl_session_timeout 5m; # ssl_ciphers HIGH:!aNULL:!MD5; # ssl_prefer_server_ciphers on; # location / { # root html; # index index.html index.htm; # } #} }
docker run --name mynginx -d -p 80:80 -v /data/nginx/conf/nginx.conf:/etc/nginx/nginx.conf -v /data/nginx/html:/usr/share/nginx/html -v /data/nginx/logs:/var/log/nginx -d docker.io/nginx name mynginx 容器名字80:80 容器端口和外部端口映射-v /data/nginx/conf/nginx.conf:/etc/nginx/nginx.conf 表示配置文件挂载-v /data/nginx/html:/usr/share/nginx/html 表示静态资源挂载
首页修改有两种方式: 直接新建一个index.html放在挂载目录会自动更新到容器中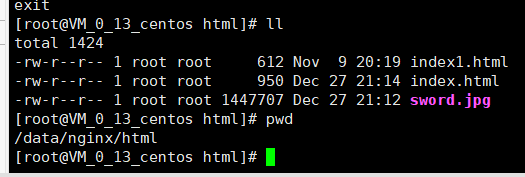 然后访问直接ip地址需要进入容器中,然后在容器中/usr/share/nginx/html/index.html 进入容器请看前面docker基础 然后使用vi命令打开index.html编辑修改 一般是容器中是没有vi编辑器的需要安装 安装Vi:apt-get install vim, 如果提示:Unable to locate package vim, 则需要敲:apt-get update, 等更新完毕以后重新安装: apt-get install vim
5.静态资源访问 然后访问直接ip地址需要进入容器中,然后在容器中/usr/share/nginx/html/index.html 进入容器请看前面docker基础 然后使用vi命令打开index.html编辑修改 一般是容器中是没有vi编辑器的需要安装 安装Vi:apt-get install vim, 如果提示:Unable to locate package vim, 则需要敲:apt-get update, 等更新完毕以后重新安装: apt-get install vim
5.静态资源访问
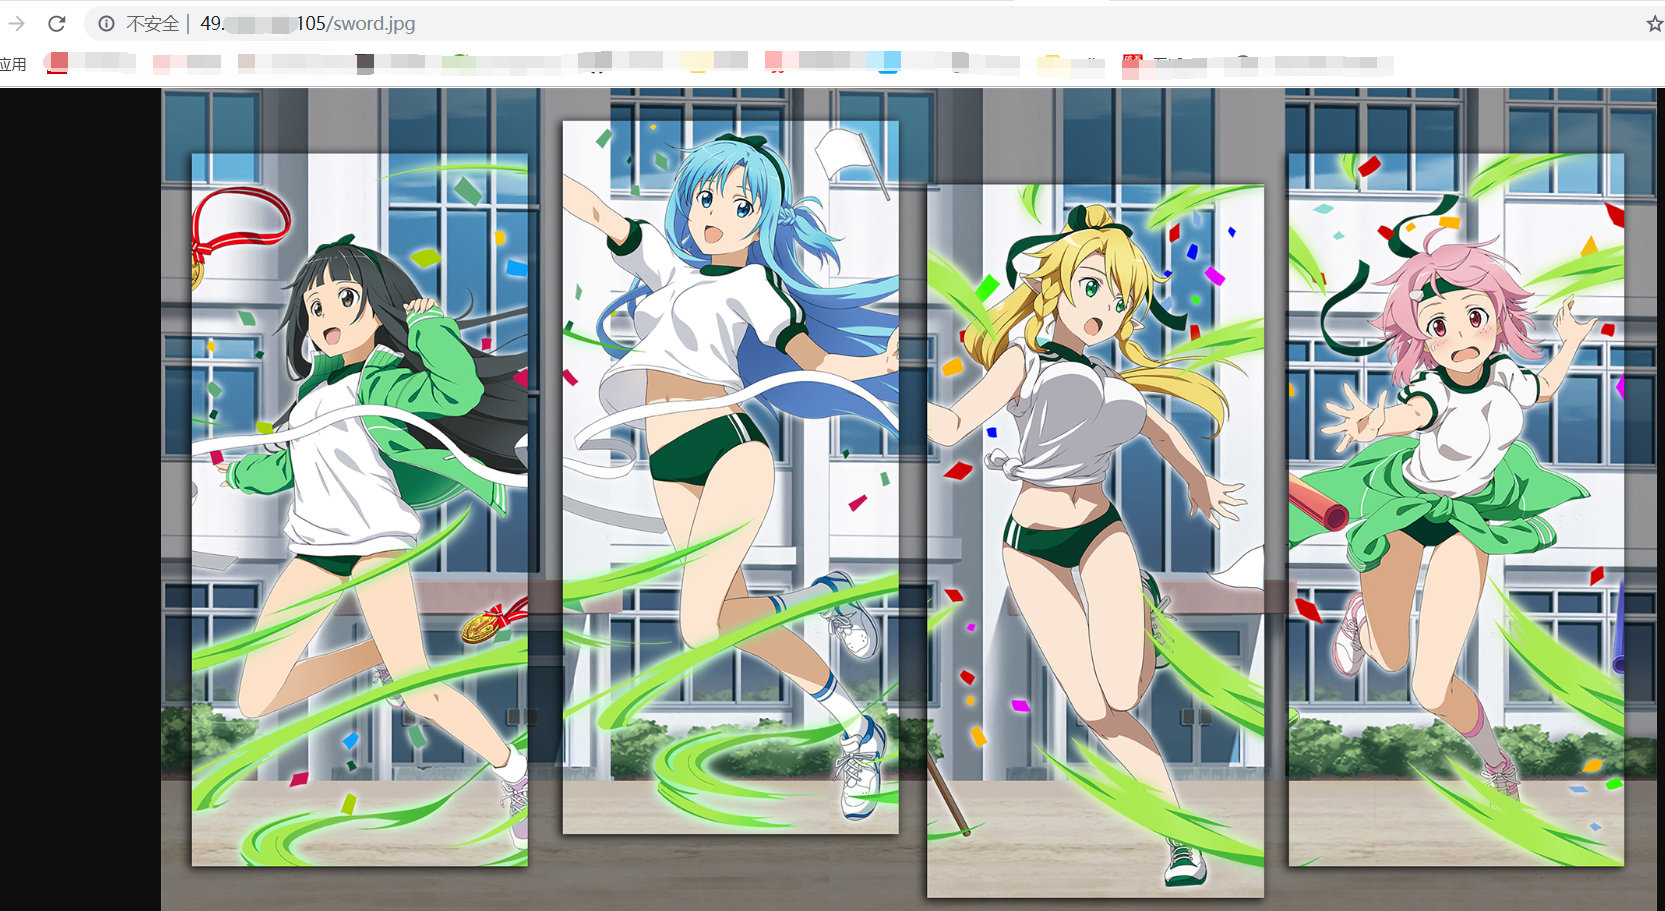
上传比如图片到静态挂载目录/data/nginx/html 我上传文件为 sword.jpg 所以直接访问 http://49.233.150.105/sword.jpg 效果如下: |
 默认使用最新版本
 index.html
 访问服务器:如果是本地就直接是127.0.0.1
【本文地址】
今日新闻 |
推荐新闻 |